Trade Capture: project details
This document is not a step by step tutorial. If you want a step by step tutorial, you can refer to the Hello World project.
As we said earlier, the Trade capture is the process of booking (or capturing) the trade into the systems used within a financial organisation.
Overview
In this project, there are the following elements:
- 2 microservices
- 2 Wpf applications communicating with the microservices
1. The microservices
Trade Capture component
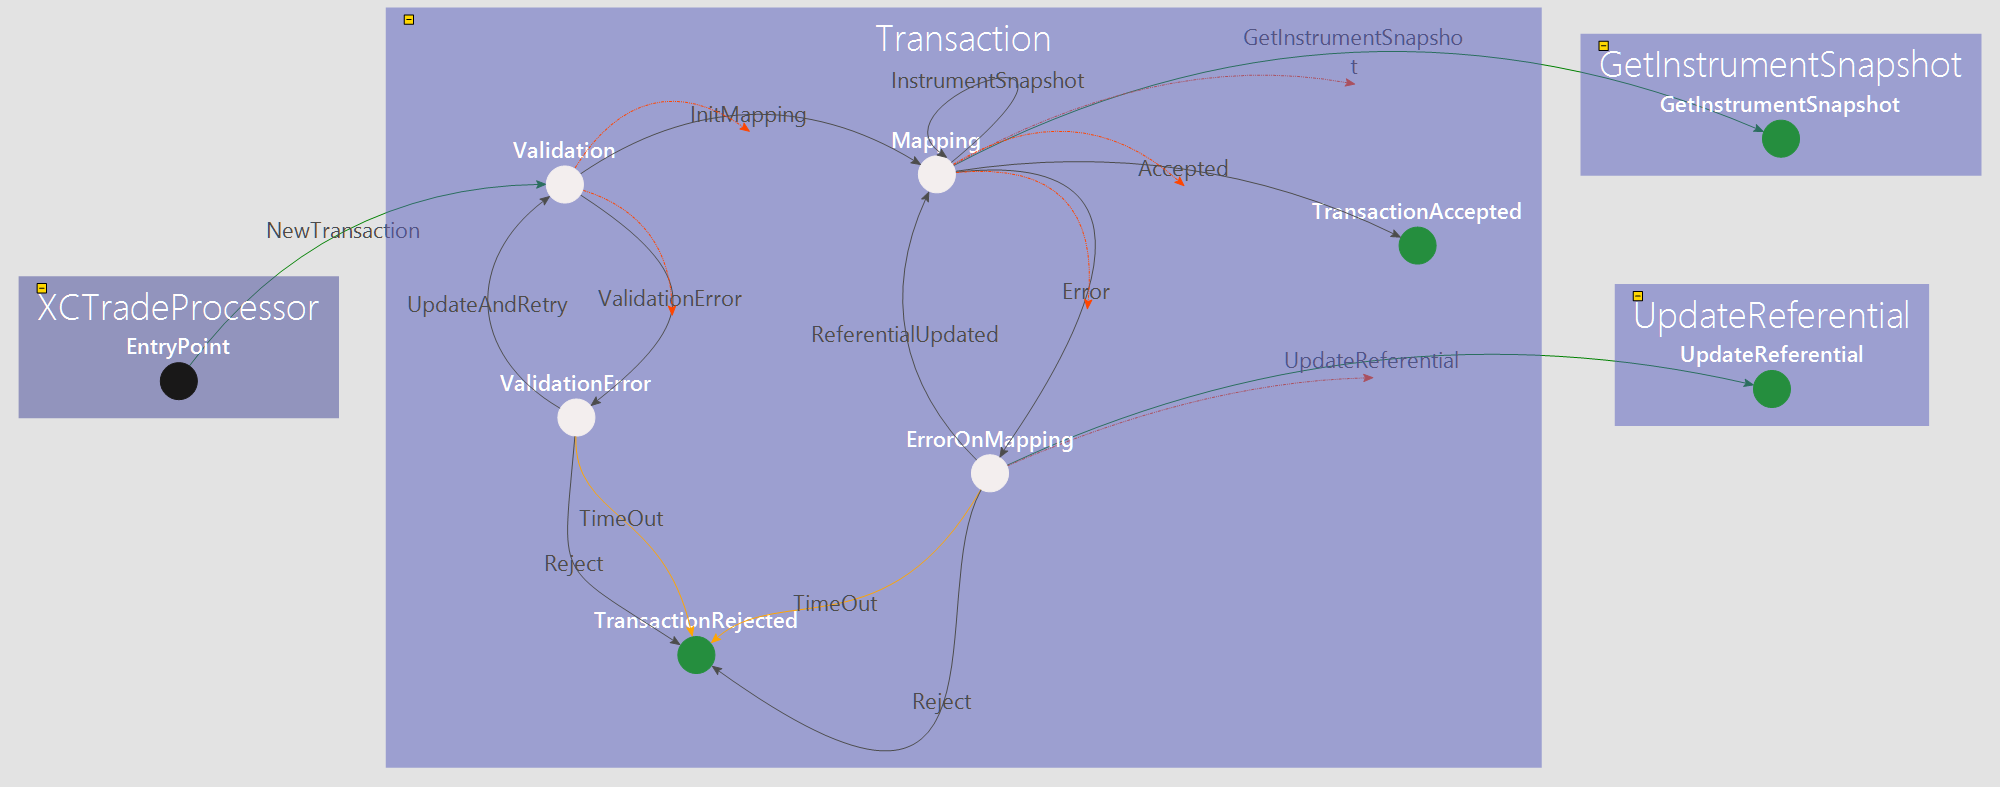
The Trade Capture component receives new trades through the NewTransaction transition.
In this project, the NewTransaction transition is triggered by an event coming from the TradeCreator Gui.
Once the Transaction (the Trade) is received, the Transaction state machine is allocated by the XComponent Runtime.
The following state named Validation checks the parameters of the transaction. If the parameters are correct, the transaction moves on the Mapping state.
From this state, we request the list of the instruments available in the Referential component.
- If the instrument linked to the trade is available on the referential, the transaction is accepted.
- If the instrument linked to the trade is not available on the referential, the transaction is on
ErrorOnMappingstate.
ErrorOnMapping state
- After 20 seconds in this state, the transaction is rejected
- From this state, the user (through the
TradeValidatorGui) can reject the transaction - From this state, the user (through the
TradeValidatorGui) can update the referential to add the instrument. Once the referential is updated, we go back to theMappingstate and the transaction will be accepted.
Referential component
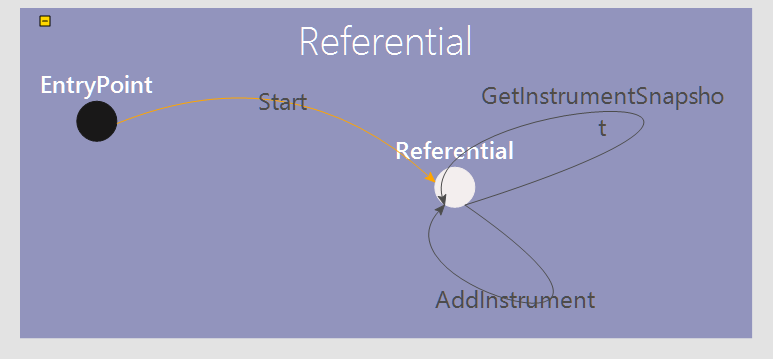
This component is very simple. The public member of the Referential state machine contains the list of valid instruments. By default, the following instruments are available:
- CL (code for Crude Oil WTI Futures contract)
- C (code for Corn Futures contract)
- WH (code for Wheat)
New instruments can be added by triggering the AddInstrument transition.
Note: This implementation is quite simple but you can easily imagine connect this component to a database without a lot of changes.
2. Wpf applications
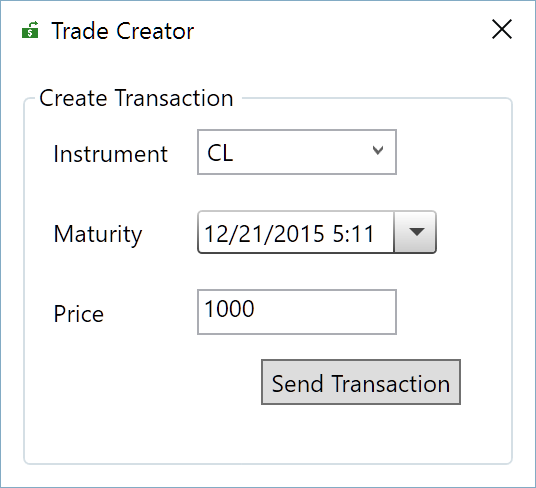
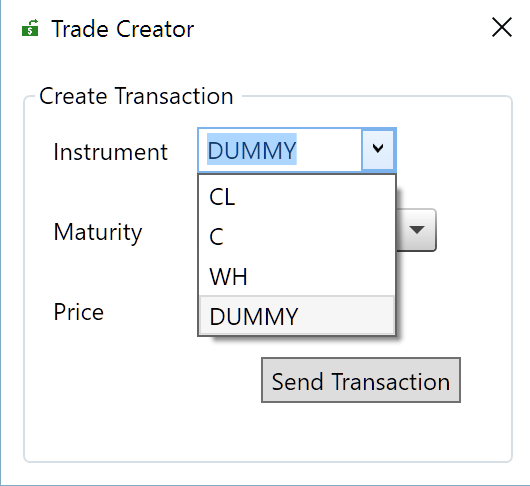
2.1 Trade Creator
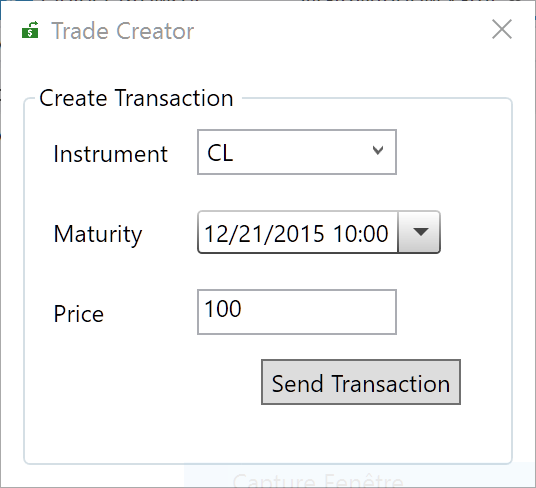
From this simple GUI, we can create new trades. The trades have the following properties:
- An instrument code: we can set this property by selecting a code from the combo box.
- A maturity date
- A price
How it works ?
2.1.1 When the application is loading, there is a call to the XComponent client api.
 Task.Factory.StartNew(() => ClientApiHelper.Instance.Init()).ContinueWith(t =>
    {
        if (t.Result)
        {
            return ClientApiHelper.Instance.Api.Referential_Component.GetEntryPoint();
        }
        return null;
    }).ContinueWith(t =>
    {
        if (t.Result != null)
        {
            var tradeCaptureViewModel = new TradeCreatorViewModel();
            foreach (var instrument in t.Result.PublicMember.Instruments)
            {
                tradeCaptureViewModel.Instruments.Add(instrument);
            }
            tradeCaptureViewModel.SelectedInstrument = t.Result.PublicMember.Instruments.FirstOrDefault();
            DataContext = tradeCaptureViewModel;
        }
        else
        {
            System.Windows.MessageBox.Show("Not connected to microservices !");
        }
    } , TaskScheduler.FromCurrentSynchronizationContext());
Note: You can notice that the call to the client api is not done in the dispatcher thread. Indeed, the
Init()andGetEntryPoint()methods of the client api are synchronous: so it is necessary in a GUI to call them from another thread.
Once the Api is initialized, the combo box is filled with the instruments available in the Referential component.
2.2.2 Create a new trade
A click to Send Transaction send an event to the Trade Capture microservices to trigger the NewTransaction transition.
   ClientApiHelper.Instance.Api.TradeCapture_Component.XCTradeProcessor_StateMachine.SendEvent(
                new XComponent.TradeCapture.UserObject.Transaction()
                {
                    ExecutionDate = _dealCaptureViewModel.DealMaturity,
                    Instrument = _dealCaptureViewModel.SelectedInstrument,
                    Price = _dealCaptureViewModel.DealAmountInt
                });
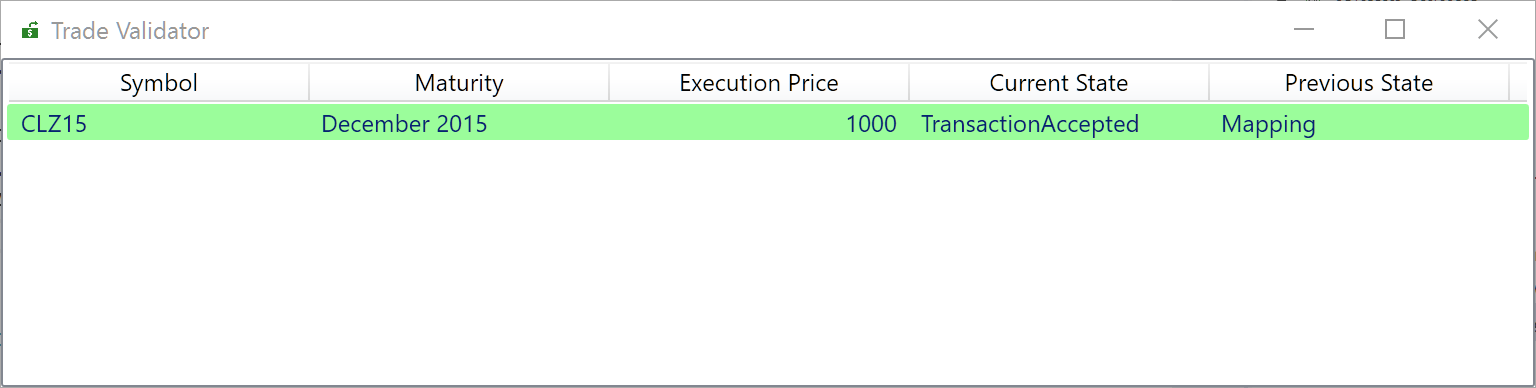
2.2 Trade Validator
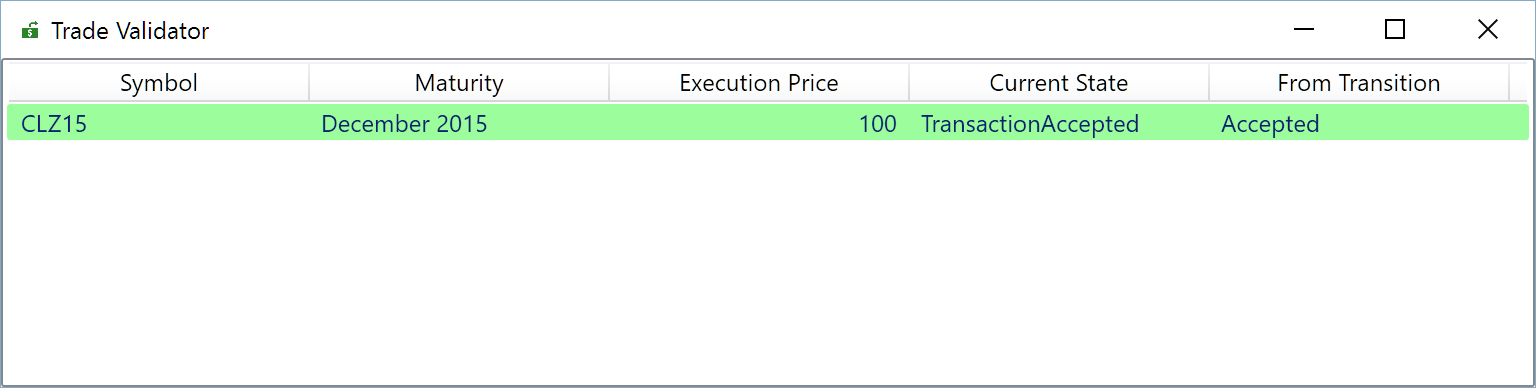
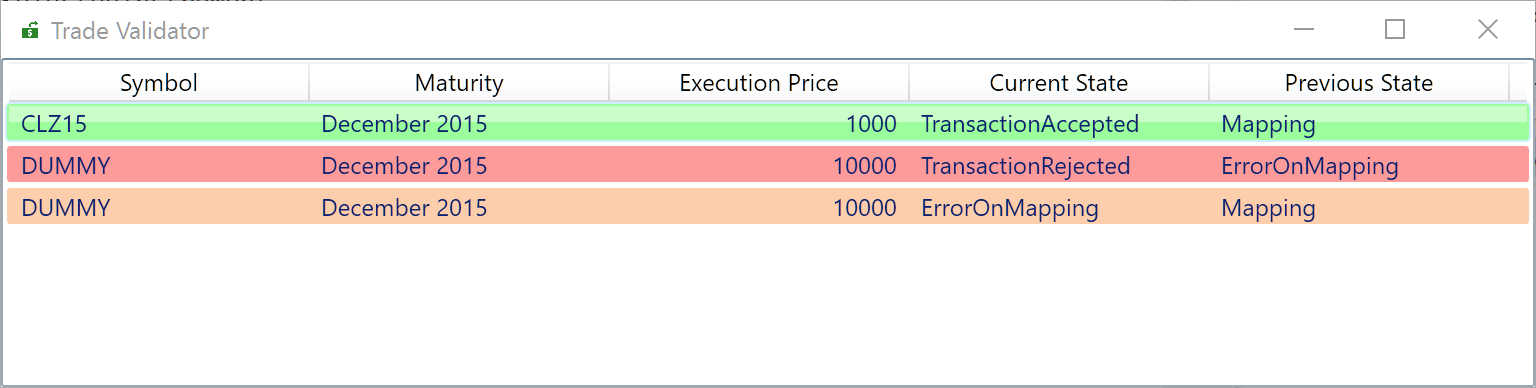
From this simple GUI, you see the trades and the status of the trades. The color of the line depends on the status of the trade:
- TransactionAccepted: green
- TransactionRejected: red
- ErrorOnMapping: orange
How it works ?
2.1.1 When the application is loading, there is a call to the XComponent client api.
 Task.Factory.StartNew(() => ClientApiHelper.Instance.Init()).ContinueWith(t =>
    {
        if (t.Result)
        {
            DataContext = new BlotterViewModel();
        }
        else
        {
            System.Windows.MessageBox.Show("Not connected to microservices !");
        }
    }, TaskScheduler.FromCurrentSynchronizationContext());
};
Note: You can notice that the call to the client api is not done in the dispatcher thread. Indeed, the
Init()method of the client api are synchronous, so it is necessary in a GUI to call them from another thread.
2.2.2 Trade Validation
The trade is on ErrorOnMapping state when the instrument is not available in the Referential microservice.
When a trade is on ErrorOnMapping state, you can right click on the line. You have 2 options:
- Reject the trade: The trade is rejected
- Update and Retry: This command sends a request to add the instrument in the
Referential. Once theReferentialis updated, the transaction is accepted.
3. Testing the application
- Start the microservices
- Run the GUIs
Test 1 - Test a known instrument
In the Trade Creator Gui, select an instrument from the combo box and click on Send Transaction
In the Trade Validator Gui, you can notice that the transaction is in TransactionAccepted status
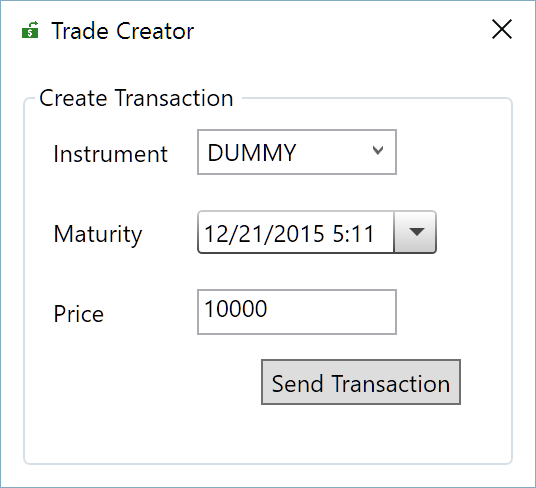
Test 2 - Unknown instrument which timed out
In the Trade Creator Gui, enter a new instrument (named DUMMY in the screenshot) and click on Send Transaction
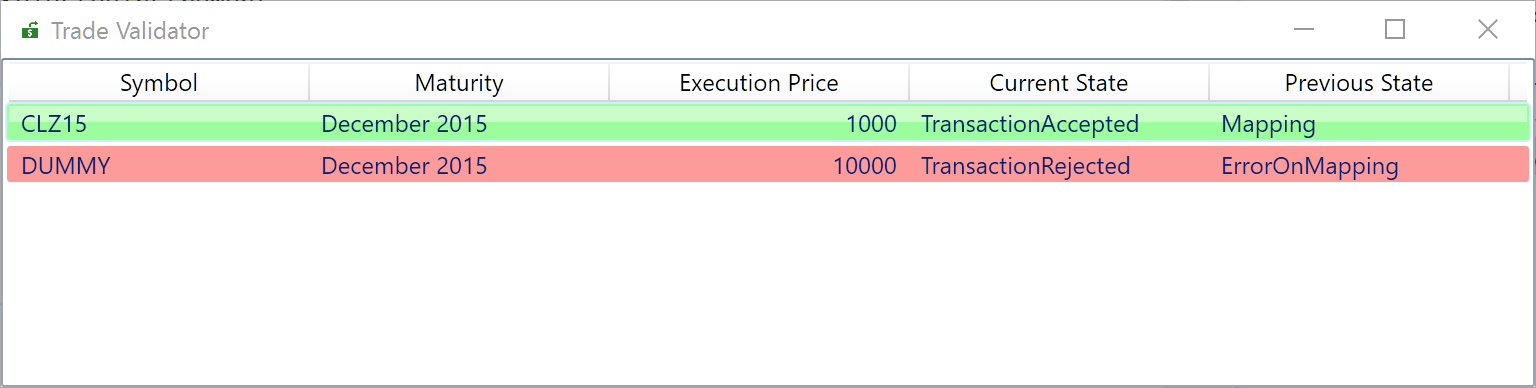
In the Trade Validator Gui, you can notice that the transaction is in ErrorOnMapping status.
After 20 seconds, the transaction will be in TransactionRejected status.
Test 3 - Accept an unknown instrument
In the Trade Creator Gui, enter a new instrument (named DUMMY in the screenshot) and click on Send Transaction
In the Trade Validator Gui, you can notice that the transaction is in ErrorOnMapping status.
Right click on the “orange line” and select Update and retry. Then, the transaction is accepted.
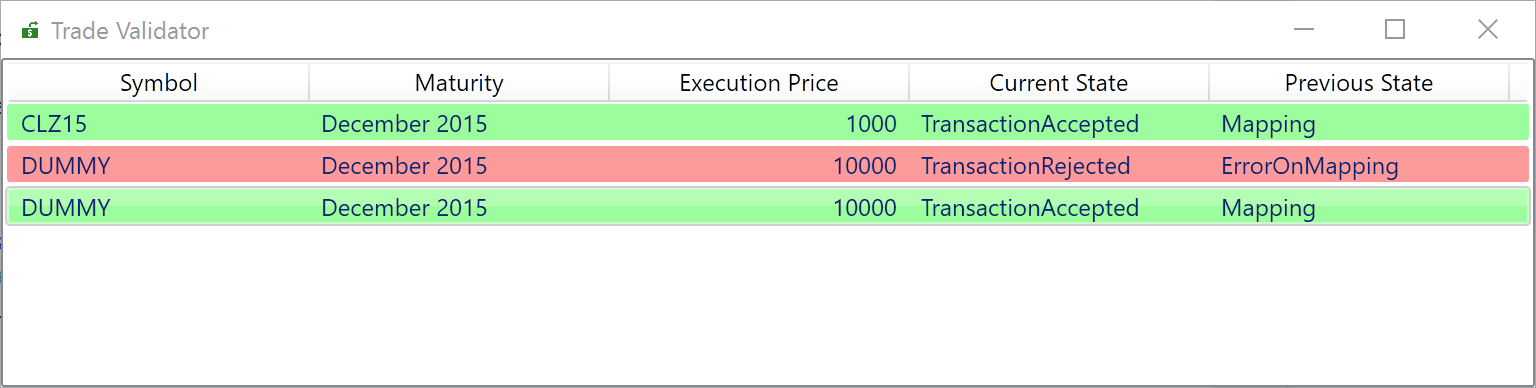
You should also notice that the combo box has been updated with this new instrument in Trade Validator Gui.
All the transactions with “DUMMY” instrument will be automatically validated.
Questions?
If you have any questions about this sample, please create a Github issue for us!