REST API Client: project details
This document is not a step by step tutorial. If you want a step by step tutorial, you can refer to the Hello World project. The aim of this tutorial is to show how to consume a Restful service via XComponent.
Overview
In the REST API Client sample we are going to create two pieces of software:
[RestConsumer microservice]- A microservice that interacts with a pet store Restful service.[Console Application]- A simple application to test our microservice
REST API Client microservice
To be able to consume a service, we need its description. And Swagger is a powerful implementation for describing RESTful services. In Swagger, the service API is described in a human-readable JSON file.
With XCStudio you can generate a proxy component for a RESTful service based on a description of that latter. For now XCStudio only supports Swagger format.
Note: For more info you can check Swagger’s website
Generate a Swagger Petstore service proxy
Swagger provides a sample Petstore service.
To generate a proxy component for the Petstore service, we do the following:
- Go to File > Options and make sure we set the Visual Studio Version to VS2012 or any upper version.
- Go to the project’s Properties and in the Environment section set the Target framework to “Framework45” and the Visual Studio Version to “VS2012” or upper.
Note: This feature is only available for .Net framework 4.5 and upper versions.
- In the Composition view we go to the ribbon and click on Add > Component from REST API…. The following window should appear:
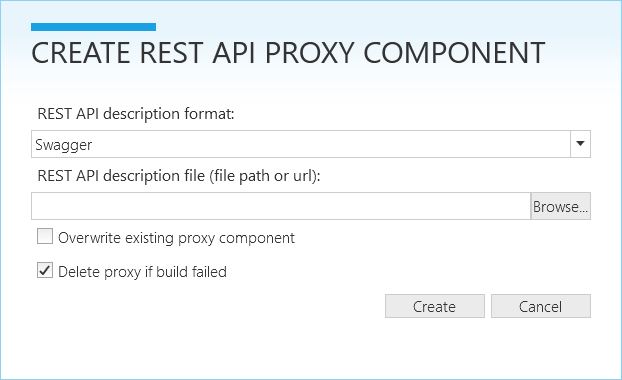
- Click on Browse… and navigate to the JSON description file.
Note: You can either enter a file path or a url to the file. Swagger provides a url for the Petstore service description. There seems to be an error in that file. So we provide a corrected version with this sample. You will also notice that, for simplicity, we omitted many operations and only 2 of them are left.
- Click on Create.
The composition view will refresh and you will notice the newly generated component. The component’s name is generated based on the service’s title present in the description. The composition view should look like the following:

Your actual model will include much more state machines.
Explore the generated component
Open the SwaggerPetstore component view. It should look like the following:
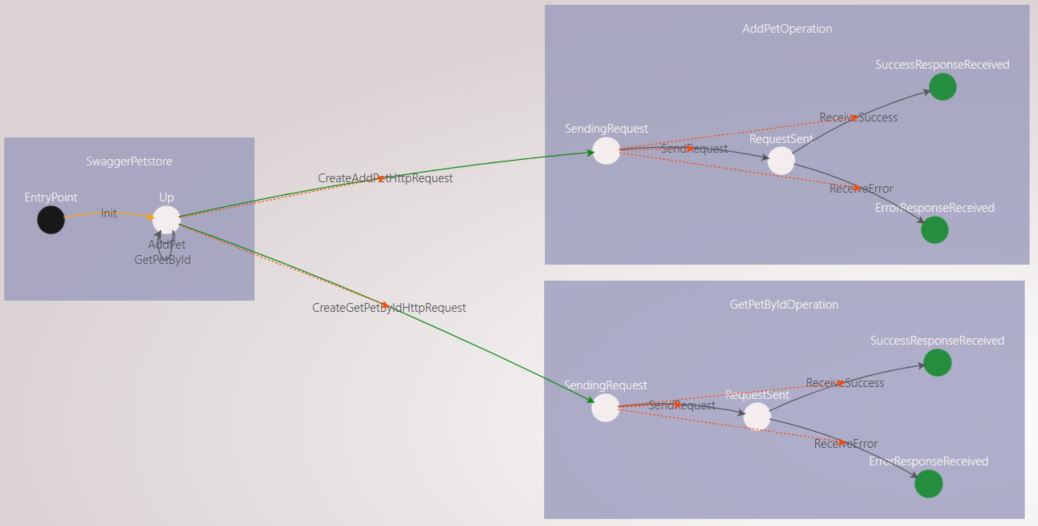
- A state machine with the service’s name is generated
- Each operation available on the service is represented by a state machine
- Each operation state machine has 4 states to describe its status:
- SendingRequest: the http request is being constructed
- RequestSent: the http request is sent to the server
- SuccessResponseReceived: We end up in this state if a successful response is received
- ErrorResponseReceived: We end up in this state when an error resonse is received
Calling a service operation via the component is simply sending the proper event to the service’s state machine.
For example, if we need to call the AddPet operation we need to Send the AddPet event to the SwaggerPetstore state machine.
We can register on the instance updates of the operation’s state machine for two main reasons:
- Get updates about the operation’s status
- Get an eventual result (for GET methods for example). That result is present in the state machine’s public member.
Expose the operations and build the project
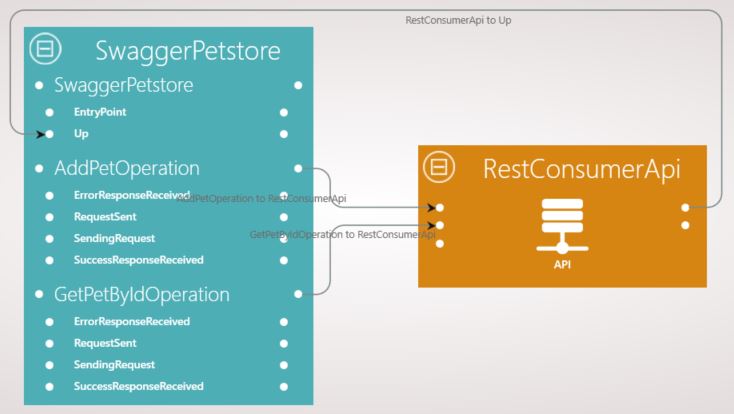
Now going back to the composition view, we need to expose the operations in the Api so they become visible for the component’s client.
- We are only going to send events to the SwaggerPetstore’s up state. So we create a link from the Api to that state
- To be able to get the instance updates of the operations state machines we need to create links from those state machines to the Api
Our Composition view should look like the following:
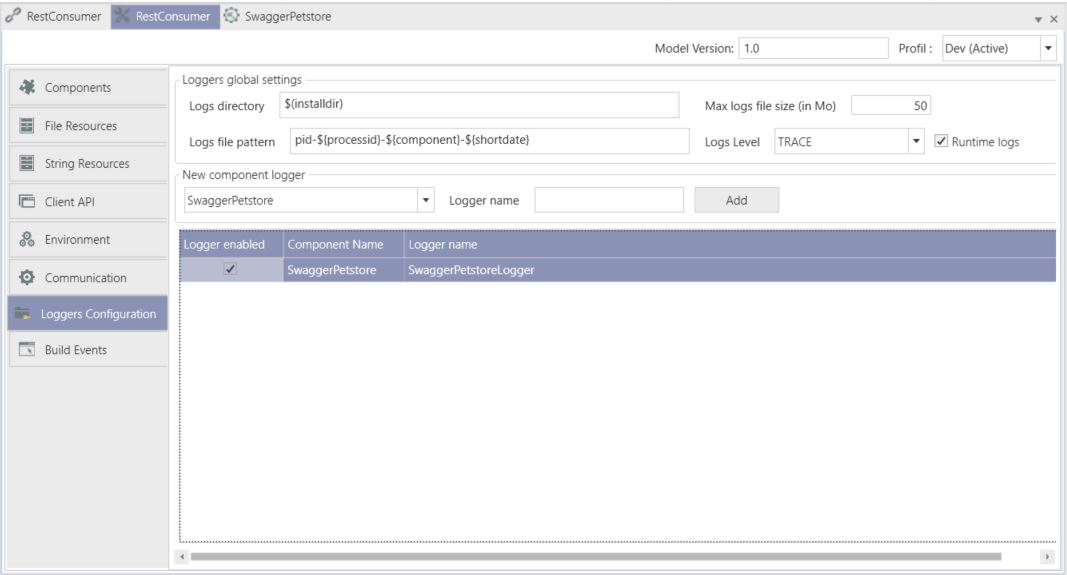
A logger is generated and we need to enable it to be able to see the component’s logs. Go to the Loggers Configuration section in the project’s properties and check Logger enabled. Here is how the configuration section should look like:
We also have the possibility to override the service’s address by defining a String Resource called “ServiceUri” for the SwaggerPetstore component.
With these configurations done, we can now build the composition.
Running the microservice
- Start RabbitMQ
- In the properties fo your project confgigure RabbitMQ on the Communication configuration. On the Components configuration, set the deployment target to Server and the serialization to Json.
- Start your microservice (Project menu + Run microservices sub menu + Start button)
Console Application
- Create a simple console application to test your microservice (Project menu + Generate console app sub menu)
- Use the Program.cs you can find (here)[../RestConsumerApi/ConsoleApplication/ConsoleApplication/Program.cs]
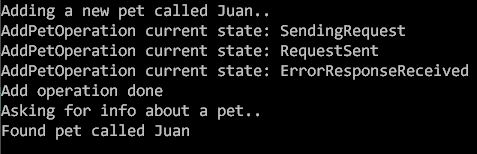
Note: this sample code enables you to add a pet with the name you want to the store then to request the pet’s info from the server.
Run your console application. You should end up with the following output:
Questions?
If you have any questions about this sample, please create a Github issue for us!