Calculator: step by step tutorial
This document describes how to create a simple Calculator microservice with XComponent whose triggered methods are implemented in JavaScript instead of C#.
Overview
XComponent is a platform to create, monitor and share microservices.
In the Calculator sample we are going to create two different pieces of software:
[Calculator microservice]- A XComponent microservice that receives requests to calculate additions;[Calculator.js worker]- A simple NodeJS application to run triggered methods coded in JavaScript.
Install XComponent Community
The easiest way to install the XComponent Community Edition is to download the latest version from Nuget
Create your first microservice
Create a new XComponent project
-
Start XCStudio
[packages\XComponent.Community\tools\XCStudio\XCStudio.exe] -
Create a new project named
Calculator:
Create your first component
- Create a new component named
Calculator:

- Create a CalculatorManager and a Calculator state machines
Note : the CalculatorManager create instances of Calculator with two numbers as input, through Calculate transition. The Calculator state machine do operation(s) with the inputs.
You should end up with the following component:

- On Entry_Point, Ready, Calculating and Done states triggered methods select Rest Worker so as they wont be generated in C# but will be implemented in any other language able to consume REST services. In the present example we will use JavaScript.
Complete your composition view
- Go back to the composition view
- Add links between your component and the default api.
You should end up with the following figure:
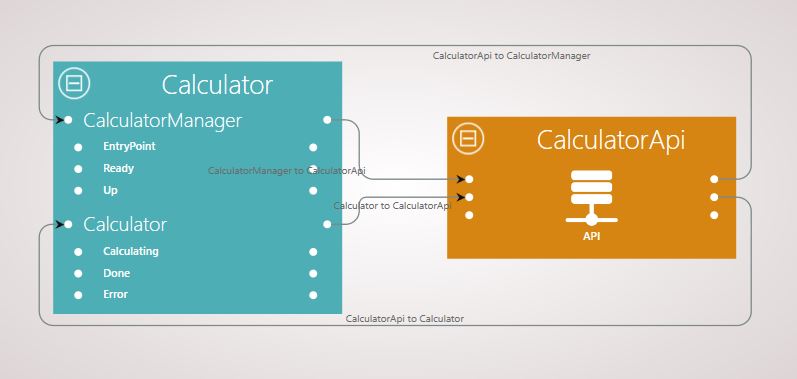
Note: In the composition view, on each component, inputs are the left side bullet points and component outputs are the right side bullet points.
Configuration
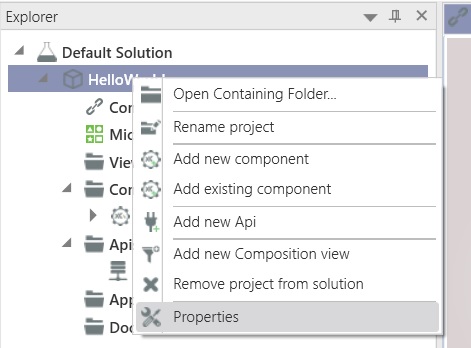
- Open the properties window of your project (see following figure)
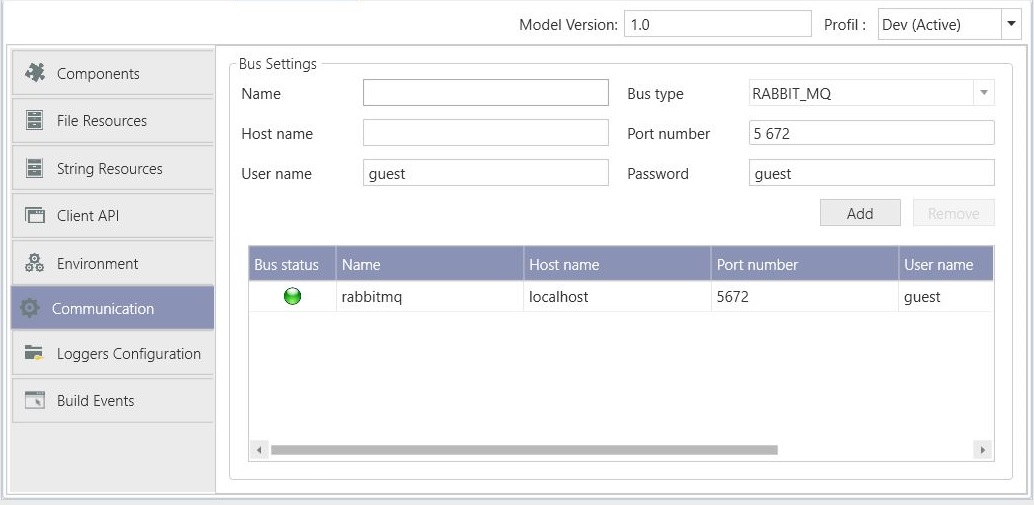
- Fill the RabbitMQ settings:
In the Communication section choose a name for the RabbitMQ bus and click on the Add button. You should see your bus with a green indicator as in the following figure:
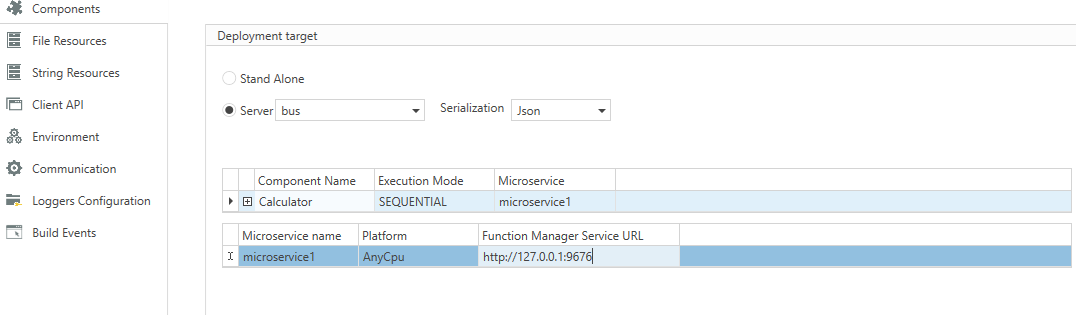
In the Components section change the deployment target from Stand Alone to Server. In the drop down you should see the previously configured RabbitMQ bus.
Test your microservice
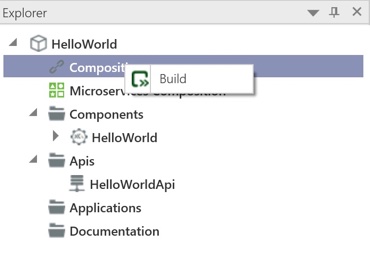
- Build your solution (see following figure)
- Start your microservice (Project menu + Run sub menu + Microservices button and then the Start button)
- Create a NodeJS application to implement your triggered methods
- Add the
xcfunctions.jslibrary to your project with the following command:PS npm add xcfunctions - Copy/Paste the following code in your index.js
const xcfunctions = require('xcfunctions');

xcfunctions.registerTriggeredMethods('Calculator', 'CalculatorManager', {
    ExecuteOn_EntryPoint: (event, publicMember, internalMember, context, sender) => {
        sender.Init();
    },

    ExecuteOn_Ready_From_Up_Through_Prepare: (event, publicMember, internalMember, context, sender) => {
        sender.Calculate({ Number1: 5, Number2: 3}, true);
        sender.Relaunch();
    }
});

xcfunctions.registerTriggeredMethods('Calculator', 'Calculator', {
    InitializePublicMember: (event, publicMember) => {
        publicMember.Result = 10;
    },

    ExecuteOn_Calculating_From_Ready_Through_Calculate: (event, publicMember, internalMember, context, sender) => {
    const result = event.Number1 * event.Number2;

        if (result >= 0) {
            publicMember.Result = result;
            sender.Finished({ Result: result }, true);
        } else {
            publicMember.ErrorMessage = 'Bad value';
            sender.Finished({ Result: result }, true);
        }
    },

    ExecuteOn_Done_From_Calculating_Through_Finished: (event, publicMember) => {
        publicMember.Result = event.Result;
    }
});

xcfunctions.startEventQueue();
- Run your NodeJS application. You should end up with an output similar to that:

Questions?
If you have any questions about this sample, please create a Github issue for us!